
Kuksa Wall Thickness, Drying and Care
A working kuksa wall is 6 to 8 mm through the body of the bowl, thicker at the base and slightly thinner at the rim. Thinner than 5 mm and the cup insulates poorly and starts to check; thicker than 10 mm and it is heavy, slow to warm and feels like a block with a hole in it.
Those numbers are the outcome of three things pulling against each other: insulation, strength in a wall with no joints to help it, and the fact that wood moves. It is worth understanding which one you are trading away before you thin a cup further than this.
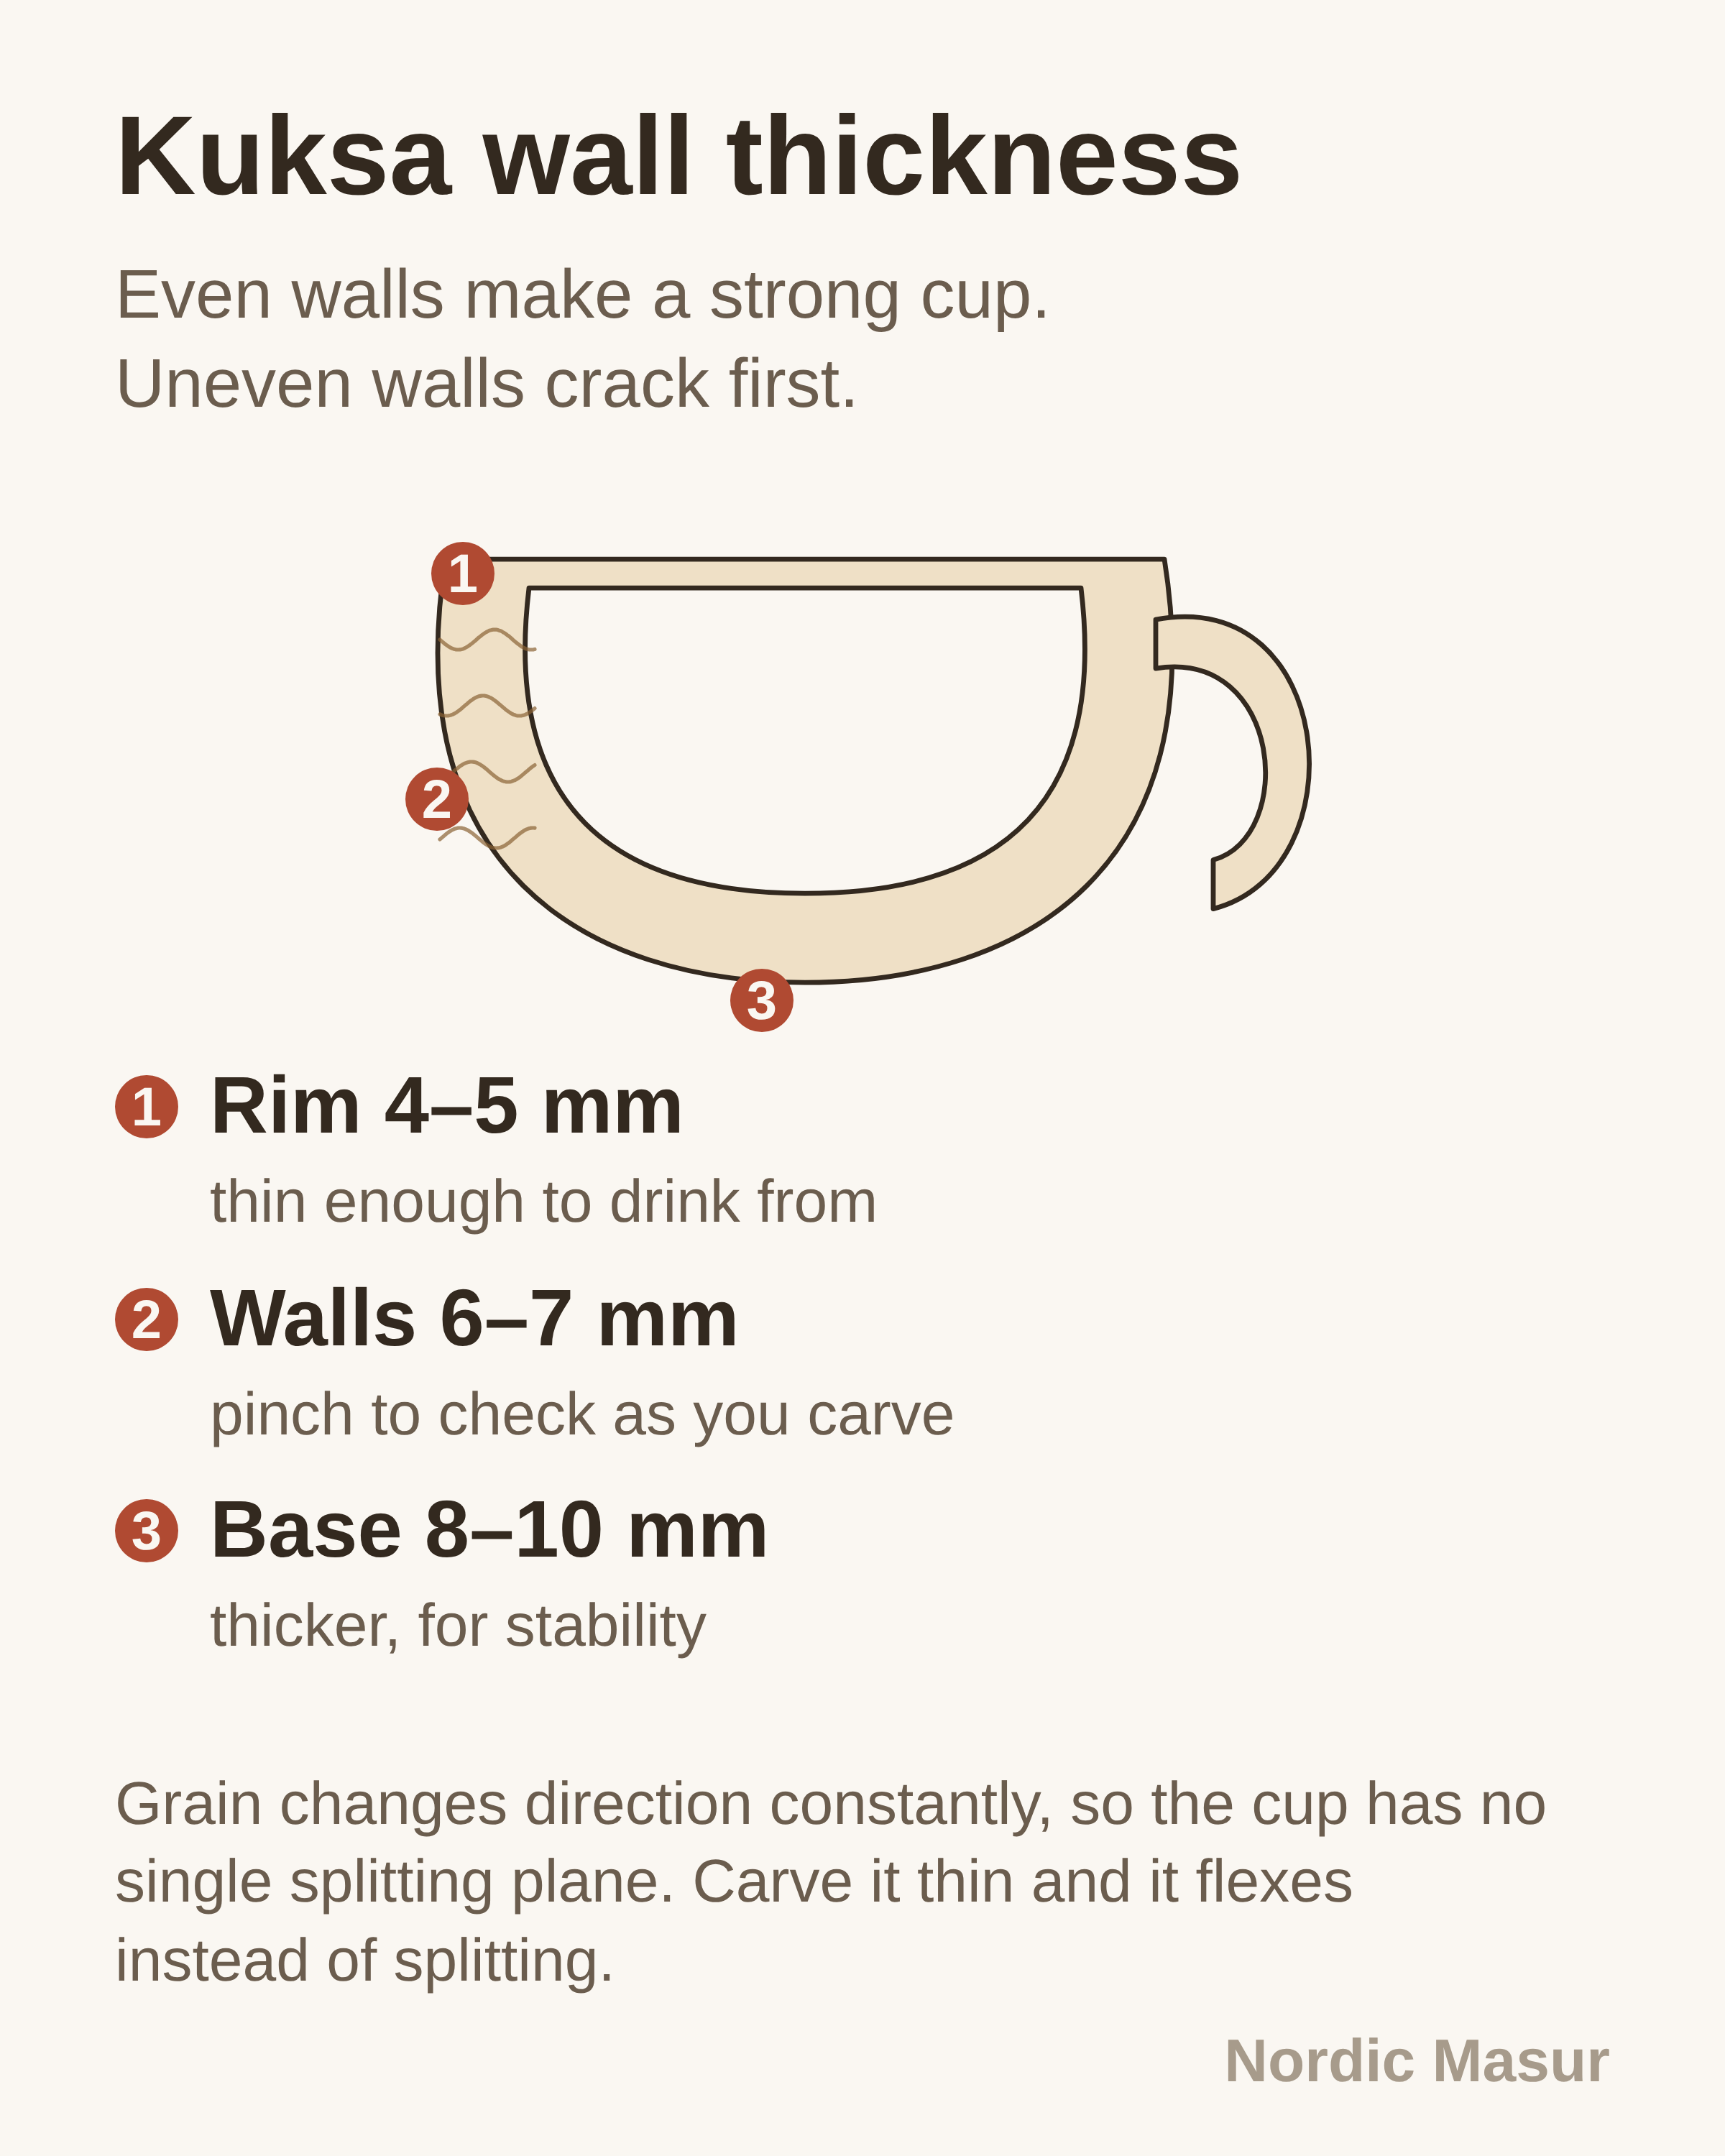
Where the thickness has to go, and where it does not
The wall is not one thickness throughout. A cup that is carved to a uniform section everywhere is harder to drink from and no stronger.
- The base carries the whole load when the cup is set down full, and it is also where a drill or gouge is most likely to have gone deep. Leave 10 to 12 mm.
- The lower third of the bowl wall does most of the insulating and takes the knocks. 7 to 8 mm.
- The upper wall thins gradually to about 5 to 6 mm.
- The rim itself is the only place worth going thin, tapered to 3 to 4 mm across a band of 10 mm or so, because rim thickness is what the lip reads as quality.
- The handle is structural in a different way and needs section rather than thinness: 12 to 15 mm through its narrowest point, more if the grain runs out anywhere along it.
The cross-section diagram on this post shows the transitions rather than the numbers alone, which is the useful part. The taper matters more than any single figure, because an abrupt step in thickness is where drying stress concentrates.
Why thin cups crack
Wood moves more across the grain than along it, and roughly twice as much tangentially as radially. A cup wall is a curved sheet, so within one circuit of the rim the wood passes through every orientation, and it therefore wants to shrink by different amounts in different places at the same time. The cup resolves that by going slightly oval, which is harmless, or by splitting, which is not.
Thickness is what buys the time for that argument to resolve slowly. A thick wall has a moisture gradient through it, the outside dries first, and the inside follows over hours. A thin wall has no gradient, it dries through in minutes, and the stress arrives all at once at the rim, which is the least restrained and most exposed part of the cup.
Figured birch complicates this in a useful direction. Interlocked, wandering fibre has no continuous line for a split to run along, so a crack that starts at the rim usually travels five millimetres and stops. That is a large part of why birch burl and curly birch became the traditional materials for a jointless cup. It buys tolerance, not immunity.
Drying a freshly carved cup
A cup carved from green wood goes into a paper bag packed with its own shavings, in a cool room, for two to four weeks. Check it every few days and replace the shavings when they feel damp. What you are doing is keeping the humidity immediately around the cup high while the whole thing loses moisture slowly and evenly.
Never put a green cup anywhere warm. Not on a radiator, not in an airing cupboard, not in a car in the sun, not in an oven on its lowest setting. Every one of those methods appears in forum advice and every one of them produces a rim check. Heat drives moisture out of the surface faster than it can arrive from the interior, and the surface tries to shrink around a core that has not shrunk yet.
Wood that is already at working moisture behaves better but is not finished moving. Our slabs and boards are dispatched at 13 to 15 percent moisture content, which is a shipping and storage figure rather than an in-service one. A workshop in a heated building in a British or North American winter will settle wood down to 7 or 8 percent, and the cup will lose that difference over its first weeks, mostly from the newly exposed inside faces. Leave a week between hollowing and the final cuts, and expect to take a light pass to bring the rim back to true.
If you have a moisture meter, watch whether the reading has stopped falling rather than the absolute number. Two identical readings three days apart means the cup has equalised with the room.
Oil, and how much
Oil slows moisture exchange, it does not stop it. A cup that is oiled inside and out changes moisture more slowly, which reduces checking, and it stains less. That is the whole benefit.
Use a drying oil or a hard wax oil, applied thin and wiped back hard after ten minutes. Three coats, a day apart. Do not flood the inside of the bowl trying to seal it. An over-oiled cup holds uncured oil in the pores, and the taste of that lasts weeks. Curly birch is dense enough that penetration is shallow in any case, which is a reason to apply less rather than more.
Skip anything that cures to a film. A varnish or lacquer inside a cup chips at the rim eventually, water gets under the film, and the film then holds it against the wood.
Washing and everyday care
Hot water and a stiff brush, immediately after use, and then hang it up to dry in air. That is the entire routine and it works.
- No detergent. It strips the surface oils and leaves a taste that survives several washes.
- No dishwasher. Heat plus prolonged saturation plus a drying cycle is the fastest way to destroy a wooden cup.
- No soaking. Leaving a cup half full of cold coffee overnight lets water into the end grain of the base, which is where rot starts.
- Hang it, do not pack it. A cup stored damp inside a rucksack goes mouldy. The hole in the handle exists for this reason.
- Re-oil when the surface starts to look dry and absorb water rather than bead it. For a cup in regular use that is once or twice a year.
Salt seasoning and coffee seasoning are traditional and optional. Salt leaves a trace in the surface fibres and coffee stains the pores so that later staining is less obvious. Neither makes the cup stronger or safer, and a cup that is simply used and oiled reaches the same place within a few months.
What this means when you order the wood
Work backwards from the finished cup. A 200 to 250 ml bowl at these wall thicknesses needs a block around 100 mm across and 80 to 100 mm deep, plus handle. You cut that block yourself: we sell logs and sawn stock, not cup blanks. A log of 13 to 25 cm diameter and 0.5 to 1.5 m length, green or air-dried as you choose, carries several of them end to end, and a 50 mm board carries a shallow one. The sizes we cut are listed under products, with more on how the wood behaves under an edge on the curly birch page.
State the finished volume and the wall thickness you intend to work to when you enquire. A carver aiming at 8 mm walls and a carver aiming at 4 mm want the log opened differently, and it is quicker to say so at the start than to be asked. Send the details through contact.
Working on something in curly birch?
One line is enough to start. If you already know the sizes and quantity, add them below and we can quote with photos of the actual boards.
Prefer email? Write to hello@nordicmasur.com.