How to Carve a Kuksa, Step by Step
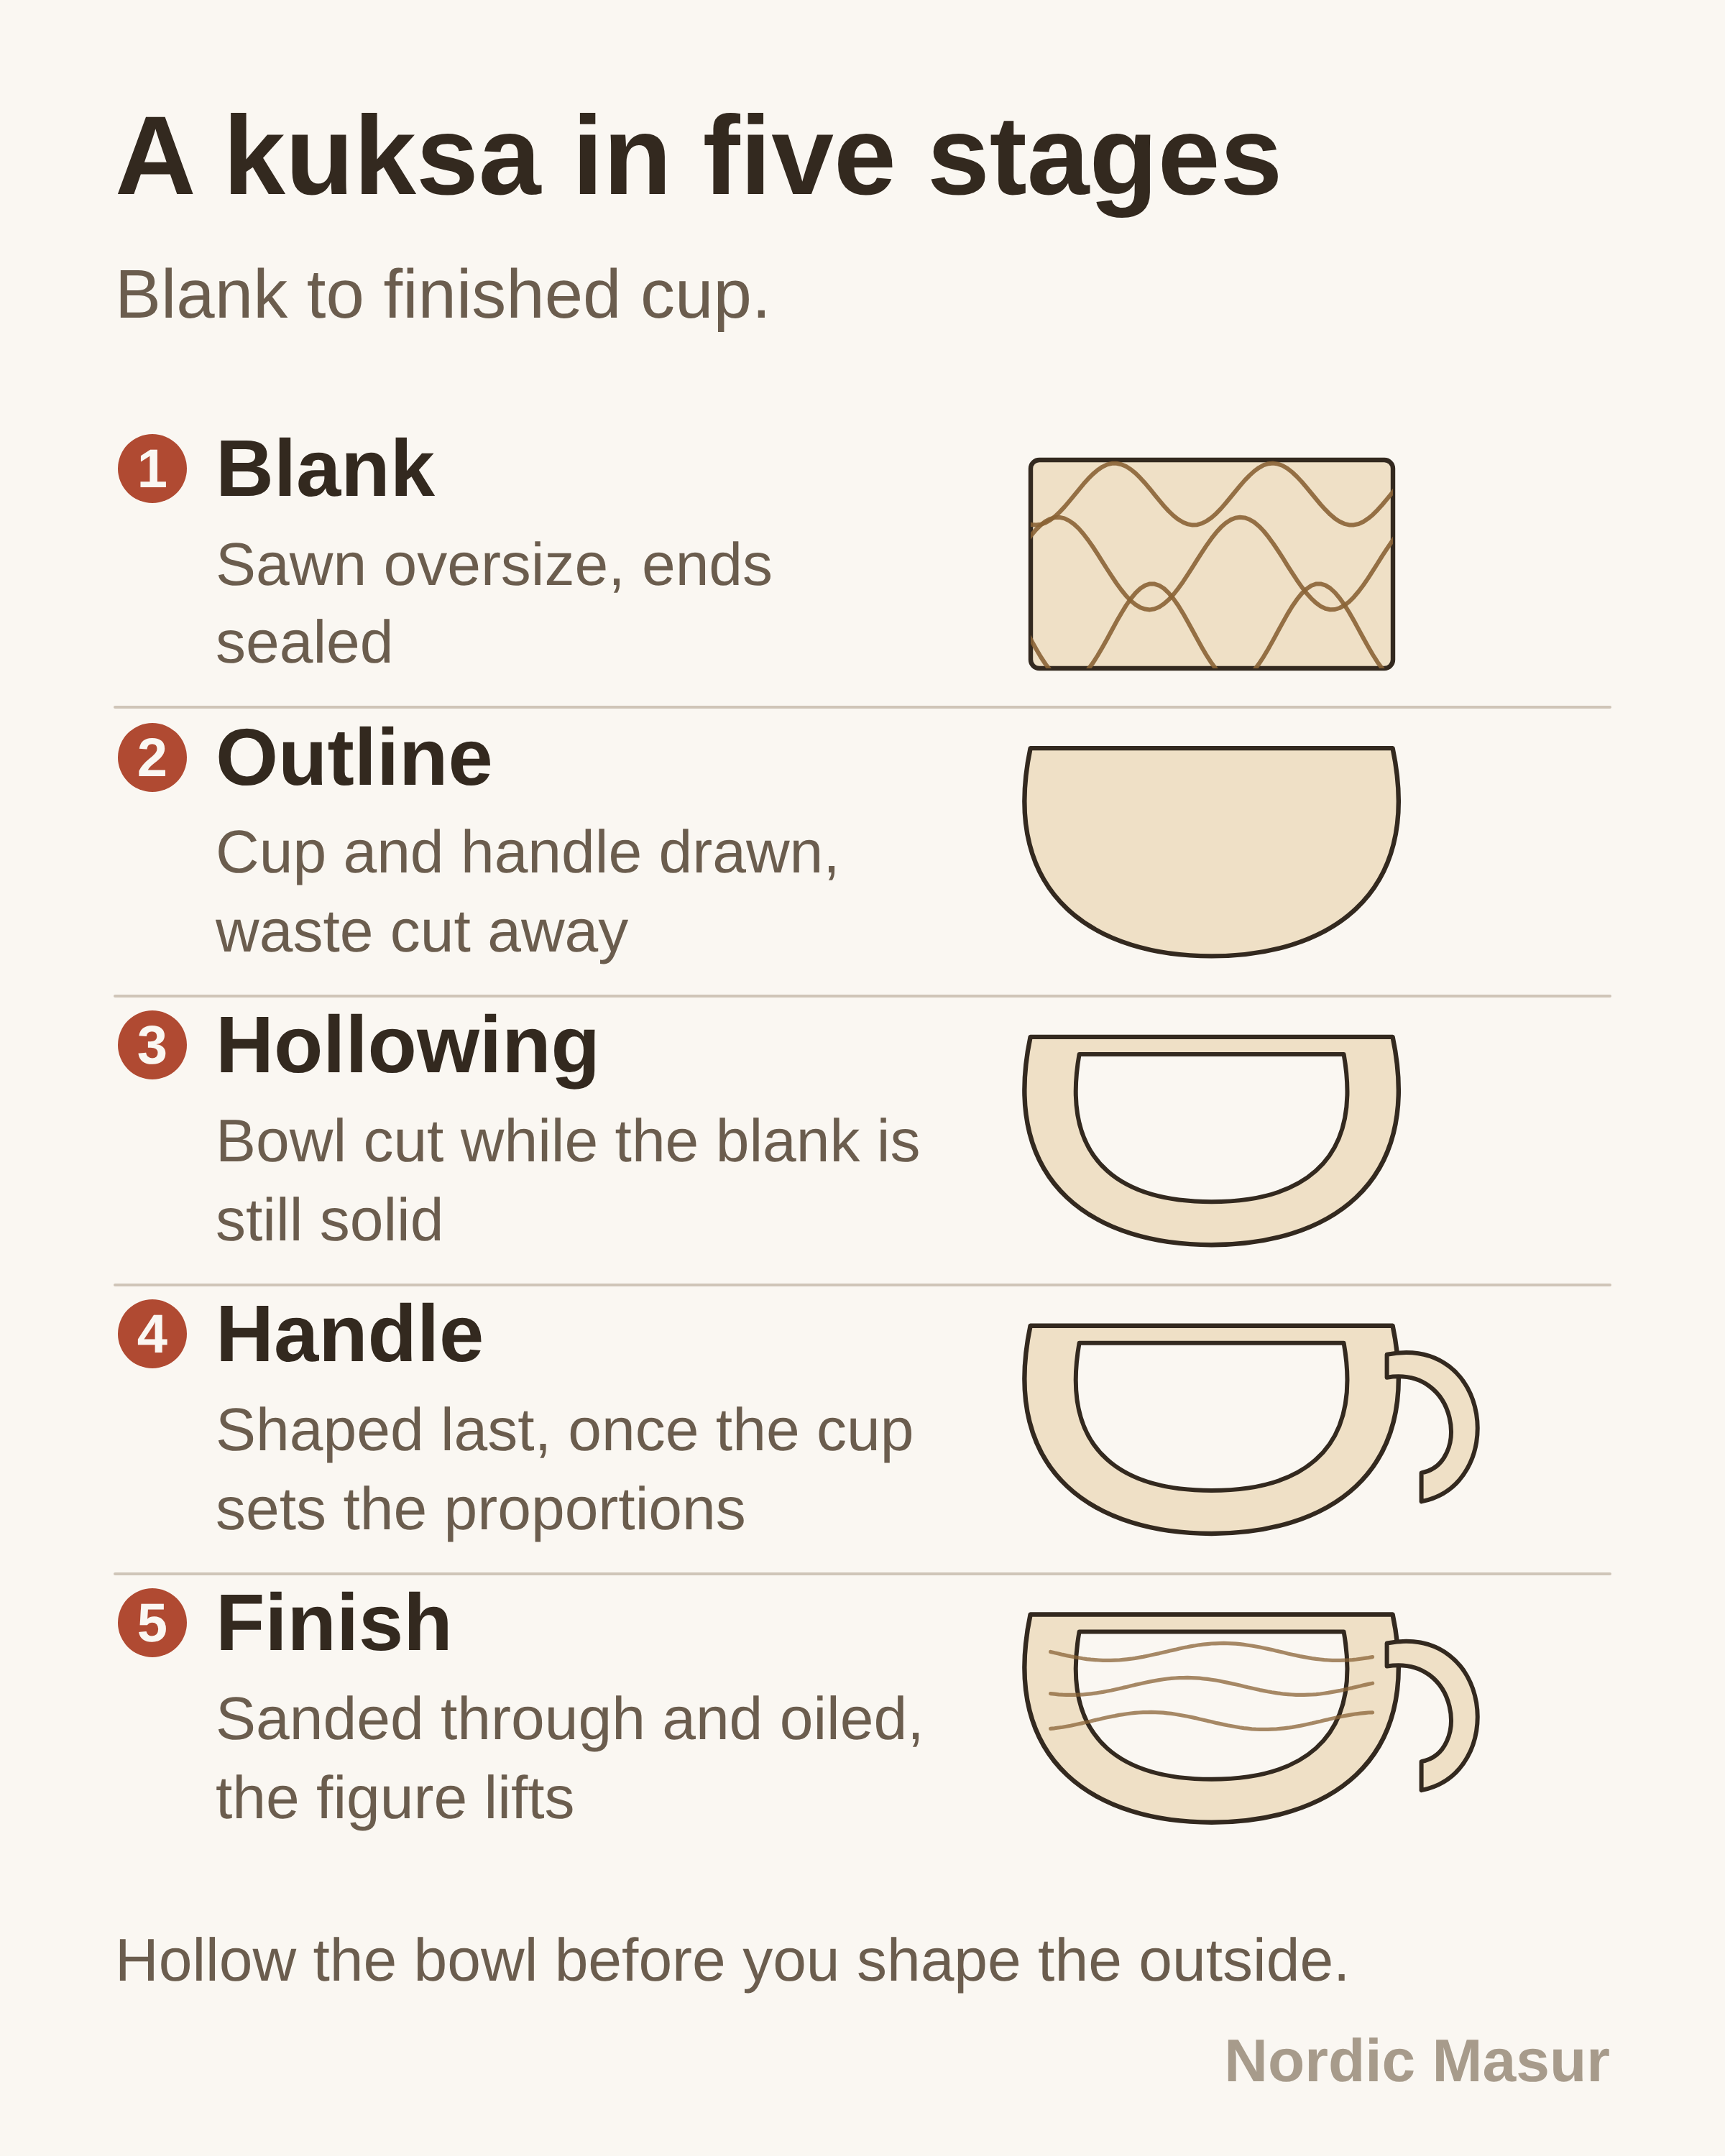
Carving a kuksa runs through five stages: shape the outside profile, mark and hollow the bowl, thin the walls to a consistent section, cut the handle, then dry the cup slowly and do the final surface work once it has stopped moving. A first cup takes most of a weekend and a second one takes an evening.
The instructions below assume figured birch, which is the traditional material and the awkward one. Where the method differs for straight-grained wood, that is flagged rather than hidden.
The tools that earn their place
A carving axe or a small hatchet for the outside profile, a sloyd knife for everything else on the outside, and a hook knife — a spoon knife — for the inside. That is the traditional set and it is sufficient.
Three additions are worth having for figured wood. A bowl gouge or a small adze removes the bulk of the waste from the hollow far faster than a hook knife and does not care much about fibre direction. A rotary burr in a flexible-shaft or angle grinder attachment does the same job with less effort and more dust. A cabinet scraper or a curved card scraper cleans the outside where a knife tears.
Sharpening matters more than tool choice. Curly birch changes fibre direction several times within a few centimetres, so an edge that cuts cleanly on one stroke will lift fibres on the next. Strop every few minutes rather than every few hours. A blunt hook knife in figured birch does not cut slowly, it tears, and the tear goes deeper than the next cut.
Stage one: the outside profile
Work out where the bowl centre will sit before you cut anything, because it decides everything after. Mark the rim circle on the top face, mark the handle, and mark a centreline down both sides so you can keep the walls symmetrical when the outside is round and there is nothing left to measure from.
Take the corners off with the axe down to a rough oval, leaving the handle end untouched as a block for now. Keep 8 to 10 mm outside the finished line everywhere. The outside gets its final shape after the bowl is hollowed, because hollowing relieves stress and the block will move a little as you do it.
If the block has a defined figure face you want on the outside of the bowl, decide now which side faces the drinker and orient the handle accordingly. Rotating the cup later is not an option.
Stage two: hollowing the bowl
Drill or gouge a depth hole in the centre of the rim circle down to about 5 mm above the intended inside floor, and mark the drill so you cannot overshoot. Every cup that ends up with a hole in the base got there because someone judged depth by eye.
Remove the waste working from the centre outwards in rings. With a hook knife, cut across the grain rather than along it and pull towards the centre, rotating the cup constantly so you are always cutting downhill on the fibre. With a gouge, take shallow passes. With a burr, take less than you think and check often, because it removes material much faster than it feels like it does.
Stop well short of the wall thickness you want. The inside surface is the hardest place to correct, and leaving 3 to 4 mm of spare at this stage costs one extra pass later and saves a ruined cup.
Stages three and four: the walls and the handle
Bring the outside down to its finished profile, then thin the walls from both faces in alternating passes, checking thickness by pinching between finger and thumb or with a pair of external callipers set to the target.
A working wall for a coffee-sized cup is 6 to 8 mm through the body, a little thicker at the base where the cup takes the weight, and a little thinner at the rim where thickness reads as clumsiness on the lip. Do not chase 3 mm. A thin cup is a party trick, it insulates worse than a thick one, and in figured birch it is the shortest route to a rim split. The cross-section is worth looking at in detail before you commit to a number.
Keep the section even. Uneven walls dry at different rates and an uneven cup pulls itself out of round as it dries. This is where the tearout appears, because you are now cutting shallow on wood that has already been disturbed, so slow down and let the scraper do the last of it.
Cut the handle last, when the bowl is done and you know where the balance sits. It should be thick enough to grip through a glove and long enough that the cup can hang, which means the pierced hole goes near the end rather than close to the bowl.
Drill the hanging hole before final shaping and from both faces, meeting in the middle, so there is no blowout on the exit side. In interlocked birch a drill that breaks through unsupported takes a chip out of the face, and the chip is always on the side you wanted to show.
Stage five: drying, then finishing
If you carved green, the cup now goes into a paper bag with its own shavings, in a cool room, away from any heat source, for two to four weeks. Change the shavings when they feel damp. The slow, buffered drop in moisture is what stops the rim checking. A green cup left on a warm windowsill will crack, reliably, overnight.
If you carved wood that was already at its working moisture, and our slabs and boards are dispatched at 13 to 15 percent, the cup will still move a little as the freshly exposed inside surfaces equalise. Give it a week before the final cuts.
When it has stopped moving, take a light final pass over the whole surface, sand only if you must and only to about 320 grit, and oil it. A drying oil, or a hard wax oil, applied thin, wiped back and left a day between coats. Three coats is enough. Do not flood the inside; a cup that is saturated with oil tastes of oil for a month.
First use is the point at which the wood tells you how well you judged the walls. Fill it with hot water, let it stand and cool, and look at the rim. Nothing is the usual answer.
Before you cut anything
Decide your finished volume, then work backwards to the block you have to cut. A 200 to 250 ml cup needs roughly 100 mm across and 80 to 100 mm deep for the bowl, plus 60 to 90 mm of handle. We do not sell cup blanks, so that block comes out of a log or a thick board and you saw it yourself. A log at 13 to 25 cm diameter and 0.5 to 1.5 m long gives several such blocks along its length, green or air-dried as you ask; a 50 mm board is enough for a shallow cup and not for a deep one. What we cut is listed under products. How the wood behaves under an edge, in more detail than a carving sequence has room for, is on the curly birch page.
If you are carving a batch and want the cups to match each other, say so when you enquire. That means all the blocks coming out of the same log, and it limits which logs are worth opening for the order. It is the single detail that most often has to be asked for afterwards, so include it in the first message through contact.
Working on something in curly birch?
One line is enough to start. If you already know the sizes and quantity, add them below and we can quote with photos of the actual boards.
Prefer email? Write to hello@nordicmasur.com.